TL;DR: A professional Florida tree removal with Panorama Tree Care follows a structured, safety-first process: ISA pre-removal assessment, permit check, work zone and equipment setup, sectional dismantling from the top down, stump grinding, debris hauling, and detailed site cleanup. Most single-tree jobs are wrapped up in one working day.
Key Takeaways
- The Panorama Tree Care removal process — including how to prepare for removal — always starts with an on-site ISA pre-removal assessment and, if needed, Hillsborough County permit verification before a single cut is made.
- Before removal day, your part is simple but important: clear vehicles and furniture, secure pets, unlock gates, and give neighbors a polite heads-up if work will be close to their property.
- On removal day, the crew establishes an ANSI Z133 work zone, stages gear, confirms utility clearance, and lays out a safe drop zone and rigging plan tailored to your property.
- Most trees are taken down in sections from the top down using arborist climbing gear or a crane, with limbs chipped in a wood chipper and logs hauled or stacked based on your quote.
- Our Florida stump grinding service goes 8–12 inches below the surface, with roots ground in a 2–3 ft radius. You can keep the mulch on site or have Panorama haul it away.
- Smaller trees typically take 1–3 hours, mid-sized trees 3–6 hours, while big or crane-assisted removals can run a full day or stretch to two days, including crane setup.
- After removal, Panorama can help with soil amendment, final grade restoration, and suggesting Florida-appropriate replacement trees that will not recreate the same problems.
- Weather, tight side yards, and nearby utilities are the main factors that can stretch how long tree removal takes in Florida.
What Is the Professional Tree Removal Process?
The professional tree removal process is a step-by-step procedure certified arborists follow to remove a tree safely and legally. It covers assessment, permitting, work zone setup, sectional dismantling, stump treatment, debris removal, and site restoration, all carried out under current industry safety standards.
Before Removal Day: What Happens First (Assessment & Permits)
Everything that happens before chainsaws ever start is what keeps removal day calm and predictable. From your first call to Panorama Tree Care through scheduling, the crew handles the ISA on-site assessment, method selection, permitting, and logistics so there are no surprises once they roll up.
ISA Assessment: How Panorama Evaluates Your Tree
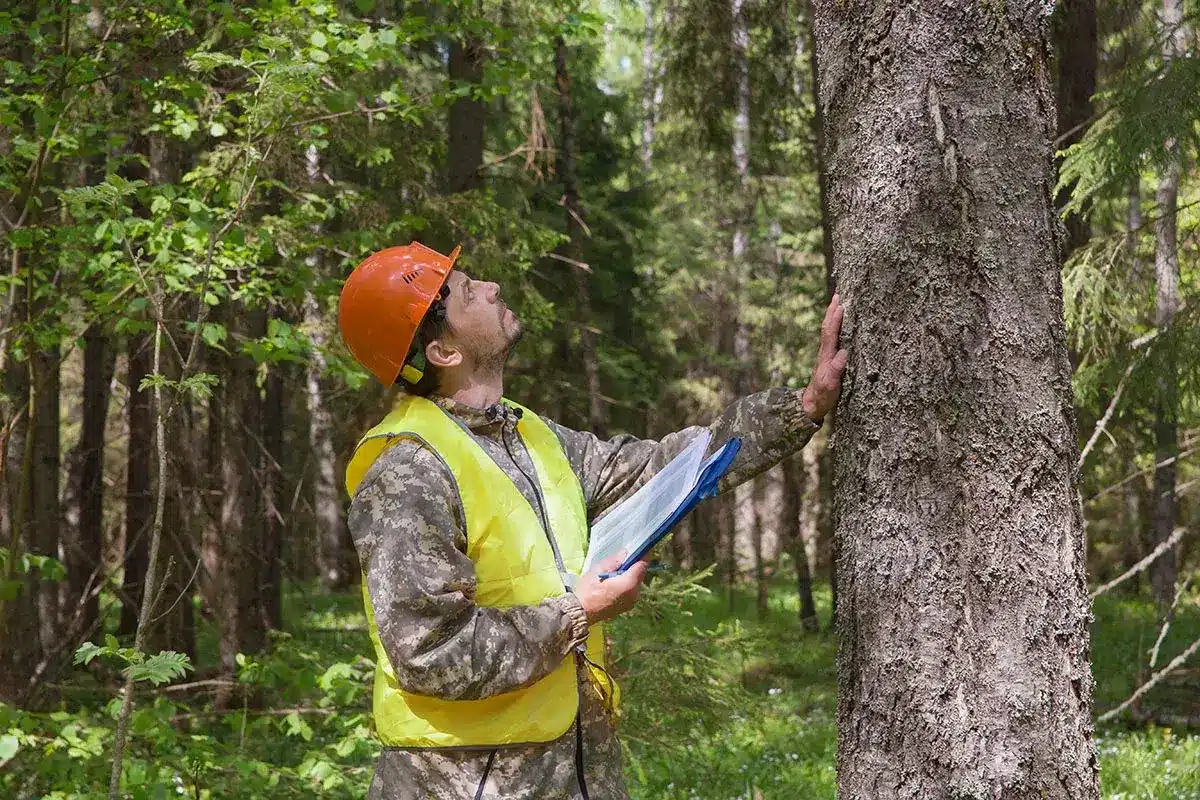
Every professional tree removal with Panorama starts with an ISA pre-removal assessment by a Certified Arborist. This is not a quick glance from the curb. It is a structured visit focused on risk, tree biology, and how to get the work done safely on your specific property.
Typical assessment duration: 30–60 minutes, depending on tree size, yard layout, and any complicating factors like slopes, fences, or utilities.
During the ISA assessment, the arborist takes a close look at:
- Tree health and structure – signs of decay inside the trunk, cavities, deadwood higher in the crown, unusual lean, root plate movement, or active pest and disease problems. In practice, this is where hidden hazards are uncovered.
- Tree size and species – overall height, canopy spread, trunk diameter, and wood density. A dense live oak rigs very differently than a brittle pine or soft-wooded laurel oak.
- Target areas – anything that could be hit if something goes wrong. That includes your roof, pool cage, fences, sheds, playsets, driveways, and neighboring homes or vehicles.
- Access and equipment path – gate width, tight corners, soft or wet ground, septic tanks, drainfields, and overhead obstructions. This is where the arborist decides what gear can safely reach the tree.
- Utilities – how close the tree is to overhead power lines, service drops to your house, and any known or marked buried utilities. This is where utility clearance verification becomes part of the plan.
- Traffic and public areas – nearby roads, alleys, sidewalks, or public walkways that might require OSHA-compliant traffic control and extra spotters.
You’ll usually receive a written recommendation and quote the same day, spelling out exactly what’s planned so there is no guesswork:
- Whether the tree truly needs to come out or if pruning, cabling, or a different treatment is a realistic alternative
- The recommended removal method for your situation, whether that’s climbing, aerial lift, or full crane-assisted removal
- What is included in the scope, such as stump grinding, debris hauling, leaving firewood, or basic grade touch-up
- Any needed permits or utility coordination so the job is legal and safe from a code standpoint
Cost of assessment: For most standard Florida removals, that pre-removal assessment is rolled into your quote and not billed as a separate visit if you move forward with Panorama Tree Care.
For what’s included from a pricing standpoint, the on-site quote covers labor, equipment, debris hauling, and any add-ons before any work begins.
Permit Application & Hillsborough County Verification
Florida and Hillsborough County do not treat every tree the same. Some are fully exempt, some fall under residential rules, and others are protected. Trying to guess where yours lands is where many homeowners get tripped up.
Panorama handles Hillsborough County permit verification as part of the project so you are not stuck decoding ordinance language on your own.
Before removal day, Panorama will typically:
- Confirm whether your tree is exempt, residential, or protected using the latest county criteria and measurements.
- Collect the right documentation for a permit request, including photos, a simple site sketch, and written hazard notes from the ISA assessment.
- Submit a formal permit application when the tree qualifies as protected, listing accurate species, size, and location details.
- Track permit status and only schedule the job after approval so you are never at risk of fines for premature removal.
Because local rules get updated and exceptions change, Panorama keeps the detailed regulatory information on a separate, dedicated page so you always see the latest version. For deeper information on categories, exceptions, and what paperwork is needed, see: (add this link on the hub or related page).
Method Selection & Scheduling
Once the ISA assessment is complete and permit status is clear, the arborist chooses the safest, most efficient tree removal procedure for your specific yard. That decision is based on more than just tree size. It also factors in obstructions, soil, and your goals for the space afterward.
Typical method options:
- Climbing & rigging: An arborist climbs using arborist climbing gear and carefully dismantles the tree in small sections that are lowered by rope. This is usually the go-to method for tight backyards and trees over fences or sheds.
- Aerial lift: A bucket truck is used when there is enough driveway or roadside access and overhead clearance. This can speed up work and reduce exposure for the climber, especially on mid-sized trees near the front of a property.
- Crane-assisted removal: When trees are extremely large, rotten, or directly over houses and pools, a crane staging area is set up and big sections are lifted away in controlled picks.
The method picked drives the whole sectional dismantling sequence, what equipment comes to your job, how many crew members are needed, and how long the removal will actually take. For a full crane vs rigging method guide covering crane, rigging, and straight felling, head here:
Scheduling & follow-up timeline:
- Most removals are booked within 3–14 days after permit approval, depending on weather, season, and current workload.
- You’ll get a confirmed removal date and arrival window so you know when to expect trucks and equipment.
- The office will often reconfirm 24–48 hours ahead, especially during stormy seasons, so everyone is on the same page.
How to Prepare Your Property for Tree Removal
A clean, open work area lets a professional crew work safer and faster. You are not expected to drag limbs or touch the tree, but a little preparation on your part keeps the job from turning into a circus.
Core prep tasks in about 40 words: Move vehicles out of the way, clear patio furniture and décor near the work zone, unlock gates for direct access, keep pets safely inside, and let nearby neighbors know there will be some noise and short-term disruption.
Clear Vehicles, Driveways, and Access Paths
On removal day, the crew shows up with some serious iron. They will need room for trucks, a wood chipper, and possibly a stump grinder or even a crane. A blocked driveway or tight street parking slows everything down.
- Move vehicles from the driveway and immediate street front where staging and backing are likely to happen.
- When possible, give the crew a 20–30 ft wide area to set up the truck and chipper so they are not working right on top of traffic.
- Clear any side yard paths, walkways, or gates the crew will use to reach the tree with gear and brush.
Outdoor Items & Clearance Zone Dimensions
Panorama will set up a formal work zone, but anything delicate sitting under the tree before they arrive is asking for trouble. I see grills and glass-top tables under failing limbs all the time.
- Move patio furniture, grills, planters, toys, and décor out from under the drip line and away from the tree base.
- For most removals, try to open at least a 10–15 ft radius around the trunk so the ground crew can move quickly.
- In especially tight yards, the crew may need a larger buffer based on tree height and drop zone needs.
If there’s something you physically can’t move, like a heavy stone bench or built-in grill, point it out. The crew can protect it with plywood, pads, or moving blankets where it makes sense.
Gate Access, Utilities & Pet Containment
A good portion of delays on removal day come from simple access issues and unexpected hazards. Handling them ahead of time keeps the crew working on the tree instead of wrestling with locks and loose dogs.
- Unlock gates and confirm there is at least 36 inches of clear width. Wider access is needed for stump grinders, mini skid steers, or loaders.
- If stump grinding or deep digging will be near unknown lines, make sure any buried utilities are marked. An 811 utility pre-mark is standard in those situations.
- Keep pets indoors or confined in a part of the yard that is well away from both the work zone and access routes.
Neighbor Notification & Noise Expectations
Tree removal is not whisper-quiet. There will be chainsaws, a wood chipper, maybe a stump grinder. While the noise is on and off throughout the job, being a courteous neighbor goes a long way.
- Give next-door and backyard neighbors a quick text or note a day or two before the job.
- Let them know there will be some equipment noise and possibly short periods when a driveway apron or lane is slower to access.
- If the work zone touches shared driveways, alleys, or the public right-of-way, Panorama will handle any formal notifications or required signage.
Internal link suggestion: For a detailed homeowner checklist, see:
Removal Day: Step-by-Step (What Panorama’s Crew Does on Site)
Once the trucks pull up, the professional tree removal process kicks into a pretty tight routine. Panorama’s crew works through a series of defined tree removal steps, so even complex removals run in an orderly way from first cut to final rake.
In about 40 words: The crew arrives, walks the site with you, runs a safety briefing, sets up the ANSI Z133 work zone, stages equipment, and chooses a climbing or crane approach. The tree is then dismantled from the top down, the stump is handled, and all debris is processed and removed.
Step 1 – Work Zone & Equipment Setup
The day starts with crew arrival, quick introductions, and a final confirmation with you. The crew leader reviews which tree or trees are coming out, whether stump grinding is included, and where you want wood, chips, or logs placed or hauled.
Work zone establishment usually includes:
- Marking a clearance radius around the tree. When possible, this extends up to 1–1.5 times the tree height in potential movement directions.
- Building an ANSI Z133 work zone with cones, caution tape, and “keep out” signage as required for the conditions.
- Setting OSHA-compliant traffic control if they need to work along a road or disrupt a sidewalk. That can mean cones, advance warning signs, or a spotter.
- Double-checking utility clearance verification for any overhead lines or near-surface utilities that were flagged during the estimate.
Once the boundaries are clear, the crew handles equipment staging so nobody is scrambling later:
- Parking the main chip truck and wood chipper where brush can be dragged safely without crossing traffic or walkways, keeping the drop zone establishment in mind.
- Positioning the stump grinder so it can reach the stump later without driving over septic lids, delicate pavers, or tight corners.
- On crane-assisted jobs, completing crane staging. That means setting outriggers on cribbing, leveling the crane, and establishing a safe swing radius.
- Laying out arborist climbing gear, rigging ropes, blocks, friction devices, and chainsaws so the climber is never waiting on equipment.
Before the first cut, the crew runs a brief job safety analysis (JSA). They review hazards, confirm individual roles, go over communication signals, and agree on the initial rigging plan.
Step 2 – Crown Removal (Top-Down)
Ninety percent of Florida removals rely on a careful sectional dismantling sequence from the top down. Dropping a whole tree in one shot is rarely realistic around houses, pools, and fences.
Crown removal process:
- The climber ascends using modern arborist climbing gear such as a proper saddle, climbing line, lanyard, and spikes when appropriate. If a lift or crane is used, they work from that platform instead.
- From the outer canopy inward, the climber removes smaller branches first. This reduces weight, untangles crossing limbs, and clears better sightlines.
- Each branch is either:
- Free-dropped into the established drop zone when there’s clear landing space, or
- Rigged and lowered with ropes when it hangs over roofs, screens, fences, or delicate landscaping.
- The ground crew catches branches, cuts them down to size, and feeds material into the wood chipper for efficient chipper processing.
Throughout this stage, the crew tweaks the drop zone as the tree shrinks and more ground becomes visible. Communication between the climber, crane operator if there is one, and ground crew stays constant.
Step 3 – Trunk Sectioning
Once the crown is stripped, the job starts to look simpler from the ground. This is the trunk sectioning phase, where the main stem is cut into chunks that people or machinery can safely manage.
Trunk removal steps:
- The trunk is cut in vertical sections, often in the 18–48 inch range. Length depends on trunk diameter, rigging strength, and how far the pieces must be moved.
- When sections extend over structures, they are rigged with blocks and ropes or lifted out using the crane to avoid even minor impacts.
- Logs are either:
- Carried, rolled, or loaded toward the truck for log removal and off-site processing, or
- Stacked neatly on-site if your quote includes leaving firewood or large pieces for your own use.
- Near ground level, the climber may dismount and finish from the ground or switch to an aerial lift to keep footing secure.
By the end of this step, the tree is gone except for a short stump ready for grinding or other treatment.
Step 4 – Stump Grinding

If your scope includes stump work, the stump grinder is brought in after most of the heavy wood and brush are cleared away. This keeps chips from mixing with limbs and simplifies cleanup.
Typical stump grinding specifications:
- Grinding depth: Usually 8–12 inches below grade. Deeper grinding can be done if you plan to plant a new tree right in that footprint.
- Root grinding radius: Commonly 2–3 feet from the stump to knock down surface roots that impact mowing or undermine concrete.
- Mulch volume produced: A medium stump often creates 1–3 cubic yards of grindings, which is roughly the volume of a pickup truck bed piled full.
Panorama’s typical stump service includes:
- Either piling grindings over the hole in a neat mound or spreading them as mulch around nearby beds, depending on your preference.
- Cleanup included: Raking, sweeping, and blowing the immediate area so chips are contained and not tracked across patios or driveways.
For more detail on stump options, grinding depths, and when full root removal makes sense, see:
Step 5 – Debris Removal & Site Cleanup
Once the tree is on the ground, the job shifts to debris hauling and final grade restoration. This is where a professional job really shows compared to “cut-and-go” outfits that leave piles for the homeowner.
Debris removal includes:
- Feeding remaining limbs and brush through the wood chipper so nothing is left as a hazard or eyesore.
- Loading larger logs and trunk sections into the truck for off-site disposal or recycling into mulch, lumber, or other products.
- Blowing sawdust and chips off hard surfaces and lightly raking any rutted turf or disturbed mulch beds.
Site cleanup and post-removal inspection:
- The crew leader walks the area for a post-removal inspection, checking for stray branches, leftover rigging hardware, and hidden debris.
- Minor turf depressions from equipment can be raked, re-leveled, or lightly filled depending on what your service level includes.
- The foreman walks the site with you to confirm the scope is complete, answer questions, and talk about replanting or any additional restoration work.
At this point, your professional tree removal process is finished. The site is left safe, clean, and ready for soil work, new landscaping, or just open space.
How Long Does Tree Removal Take in Florida?
Tree removal time in Florida is driven mainly by tree size, access, and the method used. Local quirks like tight zero-lot-line neighborhoods, soft sandy soil, and summer storms add extra variables.
Expect roughly 1–3 hours for a small tree, 3–6 hours for a medium tree, and up to a full 8-hour day for a large one. Involved crane-assisted removals run 1–2 days, including crane staging and breakdown.
Tree Removal Timeline by Size (EAV Summary)
The table below gives a realistic time range for typical Florida jobs. These are working-time estimates once the crew is on site and set up.
| Tree Size Category | Height Range | Typical Duration |
|---|---|---|
| Small tree | Under 30 ft | Approximately 1–3 hours |
| Medium tree | 30–60 ft | Approximately 3–6 hours |
| Large tree | 60–80 ft | Approximately 6–8 hours (often a full workday) |
| Very large tree | 80+ ft | 8–12+ hours, often split across days for safety and logistics |
| Crane-assisted project | Any size where crane is required | Typically 1–2 days including crane staging, lifts, and teardown |
Florida-Specific Timing Factors
Several local conditions can push your job toward the faster or slower end of these ranges:
- Lot access: Narrow side yards, tight gates, pool cages, and AC units crammed into corners slow equipment movement and force more hands-on rigging.
- Proximity to structures: Trees over houses, lanais, sheds, or leaning toward service drops require smaller, slower cuts and more complex rope work.
- Traffic control setup: Trees along busy streets or near school zones may need extra OSHA traffic control, flaggers, and setup time.
- Weather and afternoon storms: in Florida’s summer months, lightning and high winds can stop work mid-job. Crews will not push through unsafe conditions, which sometimes means a second visit.
- Number of trees: Multiple small trees can often be stacked into a single day. Several large or compromised trees may require phased work across multiple days.
What Happens After Removal (Stump, Soil & Replanting)
Once the tree is gone, what you do with that open space matters just as much. The stump, soil condition, and your long-term plans for the area guide what happens next. Panorama can help you move from bare ground to a smart replanting plan that works in Florida’s climate.
About 40 words: After the tree is removed, the stump is usually ground 8–12 inches below grade, nearby roots are reduced, and the mulch pile is either left on site or hauled. From there, soil can be amended, the area allowed to settle, and new trees or landscaping installed.
Stump Grinding After Removal (EAV Details)
Most homeowners opt for stump grinding because it clears the hazard and lets you mow or landscape without tripping over a leftover stump for years. For a deeper look at the stump grinding options, see the dedicated comparison guide.
Key attributes of stump grinding:
- Grinding depth: Typically 8–12 inches below grade, which is enough for turf or small plants. If you plan a new tree in the same exact spot, the depth can be increased.
- Root grinding radius: Usually 2–3 feet from the stump to tackle exposed surface roots that lift sidewalks or interfere with mowing.
- Mulch volume produced: Depending on stump diameter, expect 1–5 cubic yards of grindings. That can be a modest mound or a sizeable pile.
- Cleanup included: Panorama’s standard service includes raking grindings into a pile or spreading them, and blowing chips off nearby patios, driveways, and walkways.
- Replant wait time: For a new large tree in the same footprint, a 2–3 month wait is usually recommended so grindings can settle and partially break down.
Post-Removal Site Restoration (EAV Details)
Some homeowners are fine with a chip mound they can level themselves. Others want the area brought back to a clean, ready-to-plant grade. Panorama can handle either approach.
Typical site restoration components:
- Soil amendment recommendation: For Florida’s sandy soils, backfilling the cavity with a blend of compost and topsoil usually yields better results for future sod or plantings.
- Settling period: Expect 2–6 weeks for grindings and added soil to settle, especially after a few good rains or irrigation cycles.
- Final grade service: Basic raking and leveling are often included. Precision finish grading for new sod beds or planting areas may be offered as an optional upgrade.
- Replanting consultation: A simple conversation about what to plant next is often included. Full-blown landscape design or installation is usually a separate service.
- Debris disposal method: Chips and leftover logs are typically hauled away or chipped and left based on your agreed scope.
Replanting in Florida: What to Consider
Choosing the right tree for Florida is not just about what looks nice in a nursery pot. Sun exposure, soil moisture, and available space all matter if you want the new tree to last.
Key replanting tips after removal:
- Wait at least 4–8 weeks after stump grinding before setting a new tree in the same spot, especially if it’s a larger caliper tree.
- Look at Florida-friendly trees that handle heat, humidity, and local pests. Live oaks can be great in the right spot, while crape myrtle, magnolia, and smaller ornamentals are often better near structures.
- Near pools, driveways, or foundations, lean toward smaller-maturing trees or palms to reduce future root and leaf litter issues.
- Use your replanting consultation to ask about root barriers, safe spacing from structures, and realistic mature size.
Panorama can help you select a Florida-appropriate replacement tree that fits the site and avoids repeating the problems that forced removal in the first place.
Contact Panorama Tree Care in Florida for a free assessment and estimate.
Common Mistakes Homeowners Make in the Tree Removal Process (and How to Avoid Them)
Even with an experienced crew on site, a few common homeowner missteps can add stress or surprise costs. Knowing these ahead of time keeps your project smooth from quote to cleanup.
Mistake 1: Not Understanding What the Quote Includes
One of the biggest pain points I see is assumptions. Some folks are sure stump grinding is included, or that every last stick will be hauled away, only to discover those were add-ons they never asked about.
Fix: Ask your arborist to lay it out clearly:
- Is stump grinding included in this price, or is that a separate line item?
- Will logs be hauled, cut to length, or left in a pile for you?
- Exactly what level of cleanup and grading is part of the base quote?
For the full cost structure, refer back to the pricing breakdown linked earlier in this guide.
Mistake 2: Skipping Neighbor and Utility Considerations
Skipping a quick neighbor heads-up or 811 call might sound minor, but it’s where jobs get delayed or tempers flare, especially in tight neighborhoods.
Fix:
- Let your closest neighbors know about the planned work, especially if access runs past their windows or along a shared fence.
- Make sure any needed 811 utility pre-mark is arranged well before stump grinding or deep root work near unknown lines.
Mistake 3: Hiring Non-Qualified Cutters
There is always someone with a chainsaw, a pickup, and a low price. The problem is those outfits often skip ANSI Z133 safety standards and proper OSHA traffic control. That can leave you on the hook if something goes wrong.
Fix: Confirm a few basics before you sign anything:
- The company carries valid liability and workers’ comp insurance and can prove it.
- They follow ANSI Z133 work zone standards for tree care operations.
- A Certified Arborist is involved in planning or actively overseeing the job.
Mistake 4: Rushing Replanting and Hardscape Work
I see people grind a stump, dump pavers in the hole the same week, and then wonder why the patio settles and cracks. The subgrade simply has not had time to stabilize.
Fix: Give the site the recommended settling period (2–6 weeks) and respect the 2–3 months replant wait time for big trees going in the same location. Use quality soil amendments and proper planting and compaction techniques.
Mistake 5: Not Planning for Access and Protection
Locked gates, loose dogs, and expensive furniture left under the drip line all slow the crew and raise the risk of accidents. These are simple things to fix before the crew shows up.
Fix: Follow your pre-visit checklist: unlock gates, contain pets, move fragile items, and confirm access routes with the estimator during the site visit.
FAQ: Florida Tree Removal Process & What to Expect
Here are straight answers to the questions homeowners ask most often about what actually happens on removal day, from noise levels to what you should do during the work.
How noisy is tree removal, and what hours do crews work?
Tree removal uses chainsaws, chippers, and stump grinders, so you will definitely hear it while the crew is working. Most professional crews operate during standard daytime hours, typically starting after 8 a.m. and wrapping up by late afternoon under local noise rules.
Do I need to notify my neighbors before tree removal?
You usually are not legally required to notify neighbors for normal residential jobs, but it is good manners, especially in close quarters or where work affects shared fence lines. A quick heads-up helps them plan for noise, equipment, and short-term parking changes.
Is my property protected during the removal process?
Yes. A reputable crew sets up an ANSI Z133-compliant work zone, uses a written or verbal rigging plan to control branches, and protects driveways, turf, and hardscape with mats or plywood when needed. They also maintain appropriate insurance, which backs you up if something unexpected happens.
What should I do with my pets on removal day?
Keep pets indoors or securely confined away from work areas and access paths for the entire day. This keeps them safe from noise and moving equipment, and it lets the crew focus without worrying about a dog sprinting into the drop zone.
What happens if weather delays my scheduled removal?
If heavy rain, lightning, or high winds are forecast or pop up, Panorama may pause or reschedule for safety. The office will reach out as early as possible with a new date. Crews avoid leaving half-finished removals whenever weather allows for a clean same-day finish.
Will my yard be a mess after removal?
Professional removal includes debris hauling and site cleanup as part of the standard scope. You can expect some short-term scuffing where equipment moved or where stump grinding took place, but the crew rakes, blows surfaces, and consolidates chips so the yard looks neat and safe before they leave.
Can I be home during the tree removal, and do I need to stay outside?
You are welcome to be home, but you do not need to stand outside watching. The crew leader will touch base with you at the start and again at the end. During active cutting, it is safest for you and your family to stay inside or well outside the marked work zone.
How soon can I plant a new tree after stump grinding?
For small shrubs or flowers, you can usually plant around the area within a few weeks. For a new tree in the same footprint, give it 2–3 months so the grindings and soil can settle and the area can be properly amended.
Final Summary: Understanding the Tree Removal Process in Florida
The Florida tree removal process with Panorama Tree Care follows a proven path from start to finish. You get a detailed ISA assessment, any required permitting is handled, the safest method selection is made, and then removal day runs through a clear sectional dismantling sequence, stump treatment, debris removal, and cleanup.
Knowing what to expect on tree removal day helps you prep your property, set realistic timelines, and avoid stress. Whether you are dealing with a hazardous oak over your roof, a dying palm by the pool, or storm-driven fallen tree removal logistics, understanding the professional tree removal procedure lets you make solid decisions instead of rushed ones.
Ready to move from planning to action? Visit our hub page to explore the full process and next steps: and schedule your on-site ISA pre-removal assessment with Panorama Tree Care.
Comparison: Typical Tree Removal Approaches Used in Florida
Not every tree is removed the same way. The approach depends on your yard, the tree’s condition, and surrounding structures. Here is a quick overview of the main methods Panorama may use.
| Method | Best For | Access Needs | Typical Duration Impact |
|---|---|---|---|
| Climbing & Rigging | Trees in tight backyards, over structures, or where truck access is limited | Minimal ground access, but requires a sound enough tree structure to support climbers and rigging | Standard time frame for most jobs, with extra time added on large or highly complex trees |
| Aerial Lift (Bucket Truck) | Trees along streets or driveways, and front-yard trees with open overhead space | Reliable driveway or roadside access with room to set outriggers and no low wires overhead | Often faster than pure climbing on mid-sized trees because the arborist moves quickly through the canopy |
| Crane-Assisted Removal | Very large trees, severe structural hazards, or trees directly over houses or pools | Enough space for crane staging, stable ground, and a clear swing path for lifted sections | Can dramatically shorten cutting time, but added setup and teardown mean the job may run across 1–2 days |
Step-by-Step: What to Expect on Tree Removal Day
- Crew arrival & walkthrough: The crew introduces themselves, confirms the work order, verifies which tree or trees are being removed, reviews access points, and clarifies your preferences for wood and chips.
- Work zone setup: Cones, tape, and signs are used to create an ANSI Z133 work zone. Any needed OSHA traffic control is installed along roads or sidewalks.
- Equipment staging: Trucks, wood chipper, and stump grinder are positioned for safe operation. If a crane is part of the plan, full crane staging is completed.
- Crown dismantling: Using arborist climbing gear or a bucket, the climber removes branches from the top down, either free-dropping into a safe drop zone or lowering them by rope.
- Trunk sectioning: The main stem is cut into sections sized for safe handling. Pieces are lowered or craned out, then stacked, chipped, or loaded for log removal according to your quote.
- Stump treatment: If included, the stump grinder reduces the stump 8–12 inches below grade and grinds key surface roots within a few feet of the trunk.
- Debris processing: Remaining brush is run through the chipper, and all logs or large pieces are removed or left on site in the agreed configuration.
- Cleanup & inspection: The crew rakes disturbed areas, blows off hard surfaces, and performs a joint post-removal inspection with you to verify the site is safe and the agreed scope is complete.