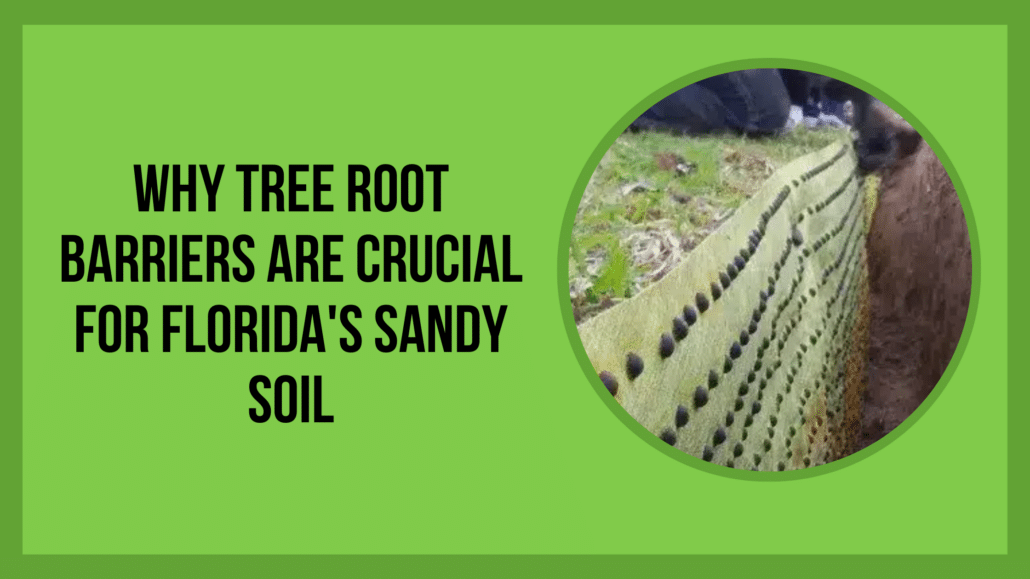
TL;DR: In Tampa’s loose, sandy soil, tree roots stay shallow and travel fast, which puts slabs, driveways, pavers, and sewer laterals in the danger zone early in a tree’s life.
Properly installed HDPE root barriers, usually 24–36 inches deep, create a vertical wall that forces roots down and away from your structure instead of into it, giving you decades of protection without having to cut the tree down.
Key Takeaways
- Florida’s sandy soils offer almost no resistance, so roots run quickly and shallow toward foundations, patios, pool decks, and sewer lines.
- HDPE root barrier membranes are the go-to option in Tampa, with professional installations typically running $15–$30 per linear foot.
- In Tampa sandy soil, barriers should be at least 24 inches deep, and 30–36 inches is smart in high-risk zones like slab edges and sewer corridors.
- Correct installation means more than just digging a trench. It includes utility locating, clean trenching, secure and sealed overlap joints, and methodical backfill compaction.
- South Tampa’s older neighborhoods come with extra headaches: huge Live Oaks, tight lots, brittle 1920s–1950s foundations, and a maze of aging utilities.
- Most projects (50–150 ft) land between $750–$6,000, which is a fraction of what you’d spend on foundation repair or a new sewer lateral.
- Root barriers protect foundations and sewer laterals while keeping mature trees, making them a key tree removal alternative for many properties.
- Professional services like Panorama Tree Care root barrier service can pair barriers with long-term root management, inspections, and arborist oversight.
What Is a Tree Root Barrier?
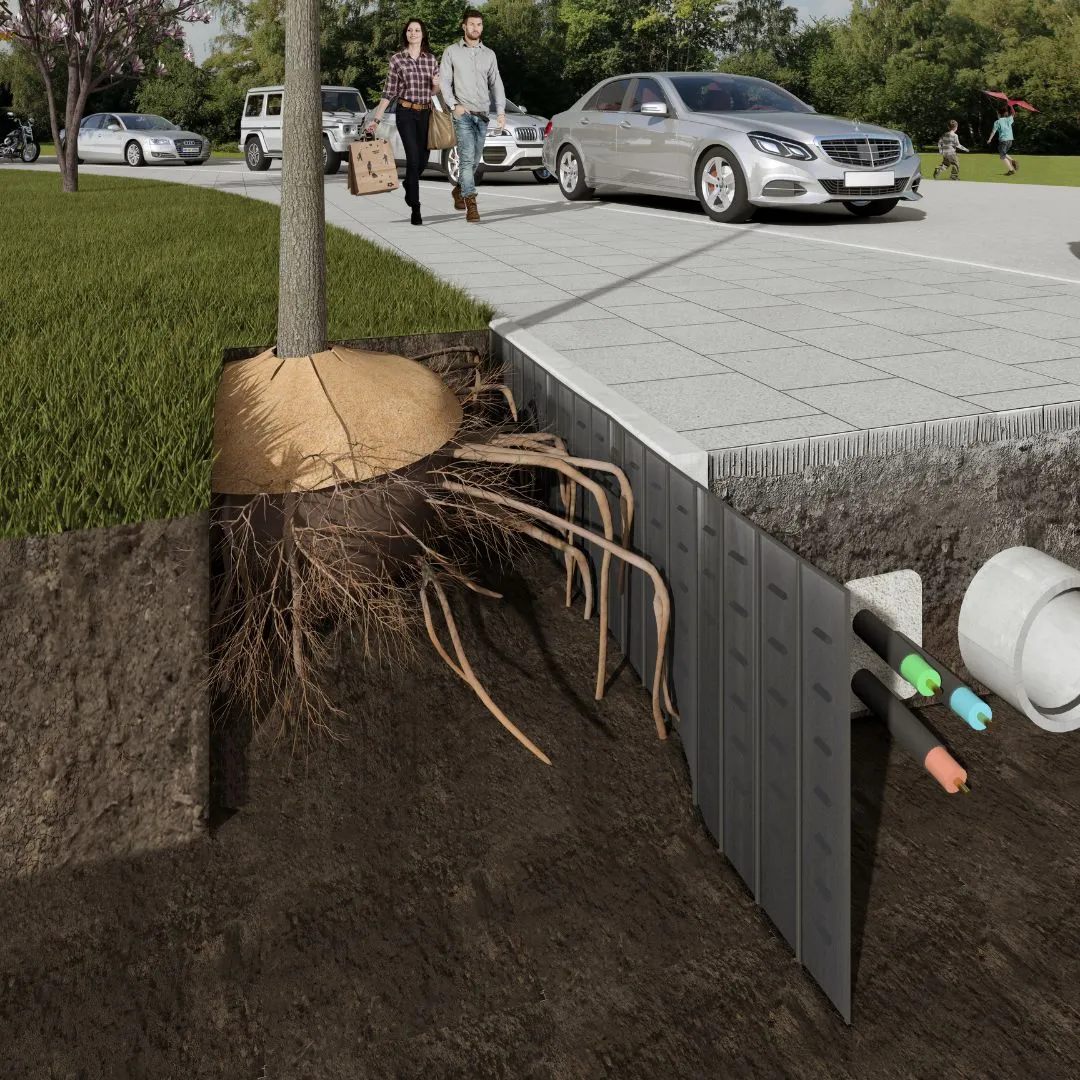
Tree root barriers are underground systems that block and redirect roots. In practice, they’re usually rigid HDPE panels, copper-impregnated geotextile fabric, or air-gap trenches installed vertically in the soil to redirect tree roots along a safer path.
In Florida’s sandy soil, they push roots deeper or steer them away from vulnerable features like foundations, driveways, sidewalks, pool decks, and sewer laterals so those roots never get a chance to jack things up.
Why Tampa’s Sandy Soil Makes Root Barriers Essential
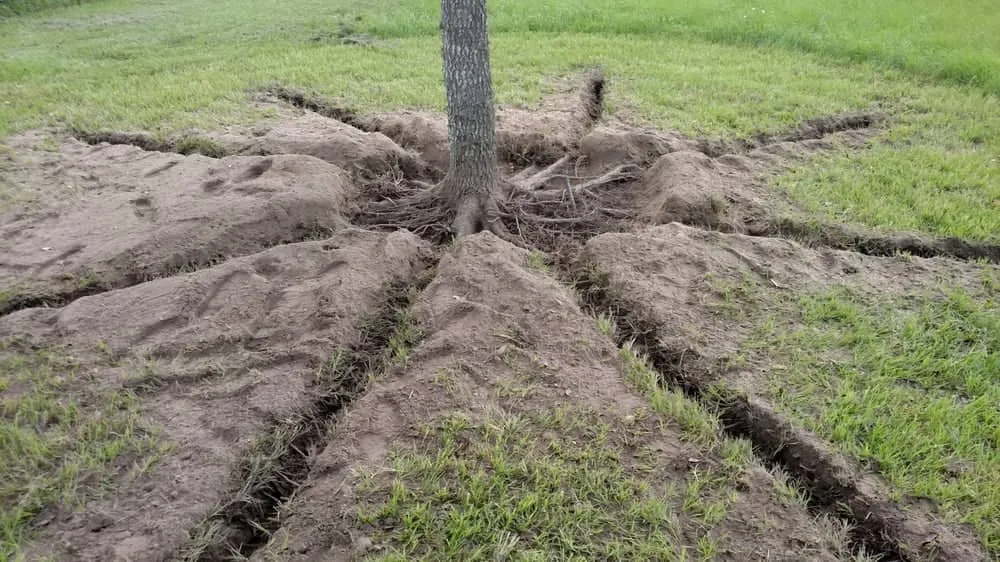
Tampa’s sandy soils behave very differently from the clays you see up north. Sand is loose, drains quickly, and offers almost no mechanical resistance. Roots love that. They spread fast and wide, usually in a shallow band where moisture, oxygen, and fertilizer are easiest to grab.
Because of that, roots end up cruising horizontally through the top foot or two of soil. That just happens to be where your driveway base, sidewalk, pavers, and a lot of residential slabs and sewer laterals are sitting. In heavier clay soils, roots are slower and often have to push deeper before spreading, so structures get a little more natural protection. Tampa doesn’t give you that luxury.
The Tampa sandy soil profile usually looks like this:
- Low in compaction – the soil is loose and fluffy compared to clay, so roots don’t hit solid “walls” that slow or redirect them.
- Low cation exchange capacity (CEC) – nutrients leach out quickly, which encourages roots to follow fertilizer and moisture sideways, chasing irrigation zones, roof runoff, and septic or sewer leaks.
- Shallow water table in many areas – roots figure out where that moisture band sits and tend to camp in that zone, spreading laterally instead of dropping deep.
Put it all together and you get a “root highway” floating around 6–18 inches deep. That’s exactly where most residential concrete and buried utilities live. Without any intervention, roots will use that highway to get to your foundation or sewer far sooner than you expect.
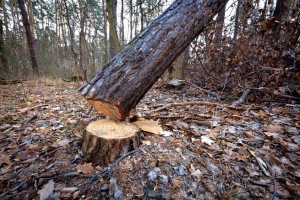
Root barriers cut straight across that highway. They don’t kill the tree. They simply interrupt the easy path and force lateral root redirection down and away from the structure. In practice, you’re training the root system to live where it’s not going to hurt anything expensive.
If you’re already seeing cracked slabs, lifted pavers, or repeated sewer backups, you’re dealing with root damage, not just risk. That’s a separate problem that’s covered fully on our root damage repair page. Here we’re talking prevention, smart placement, and how to install barriers correctly in Tampa conditions.
Types of Root Barriers (Physical, Chemical & Air-Gap)
On Tampa properties you’ll usually see three main root barrier systems: HDPE membrane, copper-impregnated geotextile, and air-gap trenches. HDPE is the workhorse option at about $15–$30 per foot installed.
Copper barriers use a chemical root inhibitor built into a flexible fabric. Air-gap trenches use a void or coarse material to discourage roots. They all can work, but they don’t perform the same in sandy soil, and each has its lane where it makes the most sense.
HDPE Membrane Barriers
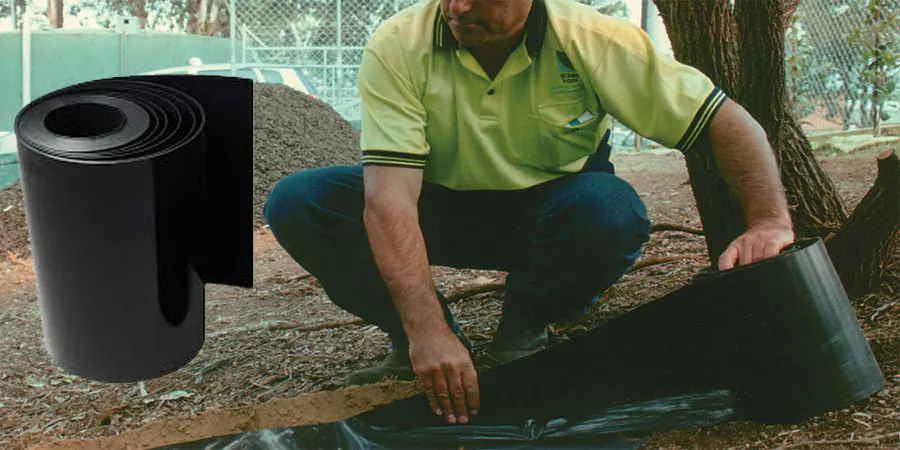
HDPE root barrier membranes are rigid or semi-rigid plastic panels that sit vertically in a root barrier trench. Think of them like a buried shield wall. Brands like DeepRoot barrier show up on most of the professional installs around Tampa because they’re strong, predictable, and proven across a lot of projects.
Typical HDPE specs in Tampa:
- Thickness: 40–80 mils (0.04–0.08 inches). Thicker panels resist punctures better and hold their shape in loose sand.
- Installation depth: 24–36 inches in Florida sandy soil, matched to the risk and the structure you’re defending.
- Cost per linear foot: $15–$30 (installed), depending on access, depth, and obstacles.
- Lifespan: 30–75 years when buried properly and protected from direct UV at the top edge.
- Root penetration resistance: 95–99% when joints are sealed correctly and the panel is stable in the trench.
Advantages in Tampa sandy soil:
- Acts as a continuous, impermeable wall that roots can’t easily punch through, even from aggressive species.
- Gives a predictable root deflection angle. In practice, roots hit the smooth face, slide down, and reroute deeper instead of wrapping or spiraling around the panel.
- Holds up well in high-traffic zones like driveways, pool decks, and sidewalks where soil movement and load cycles are higher.
- Ideal for foundation protection zones because you can run a straight defensive line along a slab or stem wall with very few weak points.
Considerations:
- You absolutely have to handle barrier overlap joint details correctly. Any sloppy joint, open gap, or loose fastener becomes a future root magnet.
- Backfill compaction is critical. In sandy soil, voids let panels shift or bow over time, and movement opens up joints or lets roots sneak behind.
- Layout has to account for everything underground. That means gas, electric, irrigation, and your Hillsborough County sewer lines. One careless scoop with a trencher can turn a cheap project into an emergency plumbing job.
Copper-Impregnated Barriers
Copper-impregnated geotextile barriers are a different approach. Instead of being a hard plastic wall, they use a chemical root inhibitor such as copper naphthenate embedded into a flexible fabric. Roots don’t like to grow where the copper is, so the barrier acts like an invisible “do not enter” zone.
Key characteristics:
- Acts less like a solid fence and more like a “no-grow” interface that roots avoid crossing.
- As roots reach the copper, their tips are inhibited. They’ll slow down, branch, or turn away instead of pushing straight through.
- The fabric bends and curves easily, so it’s handy around irregular bed edges, curved walkways, or intricate landscaping.
Tampa suitability:
- Good choice where the layout is complex and rigid panels would be too choppy or need constant cutting to fit.
- Better suited for lateral root redirection around plant beds, patios, and hardscape edges than for primary foundation defense on its own.
- Performance depends heavily on the barrier staying snug against the sandy soil. Any folds, gaps, or voids weaken the chemical interface and let roots bypass the treatment zone.
Lifespan & cost comparison:
- Lifespan: Roughly 20–40 years in real world conditions, depending on the specific product, soil moisture, and microbial activity.
- Cost: Often similar or a touch higher than HDPE per linear foot once professional installation and careful trench work are factored in.
Because Tampa’s sands can shift and settle, getting full-depth contact along the entire geotextile panel can be tricky. That’s one of the main reasons many experienced contractors still lean on HDPE for major root barrier foundation protection and use copper-impregnated systems around more delicate or curved areas where you need flexibility.
Air-Gap Trenches
Air-gap trenches rely on the fact that most roots don’t like to cross a dry void or coarse, shifting material. These systems create a barrier channel drainage zone that doubles as a drainage feature and a partial root deterrent.
Common configurations in Tampa include:
- A 12–18 inch wide trench filled with coarse rock or clean gravel that doesn’t hold much water.
- A perforated drainpipe at the bottom to move standing water away from foundations or low spots.
- Landscape fabric over the top, covered with mulch or decorative rock so it looks like a normal bed edge or border.
Pros in sandy soil:
- Helps with drainage on properties with high water tables, poor grading, or chronic wet spots near the house.
- Can work as a French drain that also discourages some surface-root encroachment, especially from less aggressive species.
Cons and limitations:
- Not a true hard “barrier”. Aggressive or invasive root species can cross it over time, especially if the trench starts holding moisture or fines fill the void.
- Less dependable for sewer lateral protection and serious slab protection compared to HDPE or copper geotextiles.
- Needs periodic maintenance. Sand and silt slowly fill gaps, and once the voids are packed, roots treat it like regular soil and move right through.
In Tampa, air-gap systems usually make sense as a supplement to physical barriers or where water management is the main goal and root control is an added bonus, not the primary reason you’re digging.
How Deep Should Root Barriers Be in Florida Sandy Soil?
Depth is where many people go wrong. They copy a generic 18-inch recommendation from a clay-soil region and drop that into Tampa’s sands. That might slow roots down, but it won’t stop them. Here, a root barrier at 18 inches is more of a speed bump than a wall.
In Tampa’s sandy soil, root barriers should be at least 24 inches deep, and 30–36 inches is usually the smart move around foundations and sewer lines. Because sand is easy for roots to move through and it drains quickly, they’ll happily push under a shallow barrier and keep going.
Why deeper barriers are needed in sand:
- Low compaction: Roots can travel downward and sideways without much effort. A shallow barrier just makes them dip a little, then they pop up on the other side.
- Water table influence: In quite a few Tampa neighborhoods, the water table floats within 3–6 feet of grade. If you push roots deeper using a barrier, they’ll occupy that lower zone instead of hugging your slab.
- Shallow infrastructure: Slabs, footers, pavers, and sewer laterals are often installed in the top 24–36 inches. That’s the zone roots want. The barrier has to cover that entire layer, not just part of it.
UF/IFAS root management guidance is clear on this point: roots respond to soil conditions. In loose, well-drained sand, they’ll explore more aggressively and go deeper if redirected. That means Tampa installations deserve more depth than broad national rule-of-thumb charts suggest.
Practical guidelines:
- Low-risk plantings: Around smaller ornamentals, shrubs, or bed edges, a 24 inch depth can work if you’re not right on top of a slab or pipe.
- Foundation and driveway protection: Plan on 30–36 inches for sandy soils, especially near corners, garage slabs, and heavy-loaded footers.
- Sewer lateral protection: Wherever you can, extend the barrier at least 12 inches below the bottom of the pipe. The idea is to intercept roots before they get any chance to dive under the line and attack a joint from below.
Root Barrier Installation Process for Tampa Properties
A solid root barrier installation in Tampa isn’t just digging a trench and dropping plastic in a hole. There’s a method that experienced crews follow to keep the tree safe, avoid utilities, and make sure the barrier actually works 10, 20, 40 years down the road.
The typical sequence runs like this: locate utilities, trench along the designed line, place the barrier and handle joints correctly, then backfill in controlled lifts and restore the surface. Every step matters more in sandy soil because it shifts so easily.
Step 1 — Utility Marking
Before any trench work, you have to know what’s underground. Skipping this is how people cut fiber lines, gas services, or their own irrigation mains. I’ve seen it more than once, and it gets expensive fast.
- Call 811 or the Florida utility locating service to mark public utilities such as electric, gas, cable, municipal water, and sewer mains.
- Have your contractor locate private utilities that 811 won’t mark: irrigation lines, landscape lighting, pool plumbing, and sometimes private water or sewer runs.
- Be aware of Hillsborough County sewer protection requirements. Damaging a county sewer lateral or main can mean permits, fines, and urgent repairs on top of your barrier project.
In older South Tampa neighborhoods, utility density is usually high and mapping is often incomplete or outdated. Experienced installers treat those lots carefully, using exploratory hand-digging in tight corridors before sending in a trenching machine.
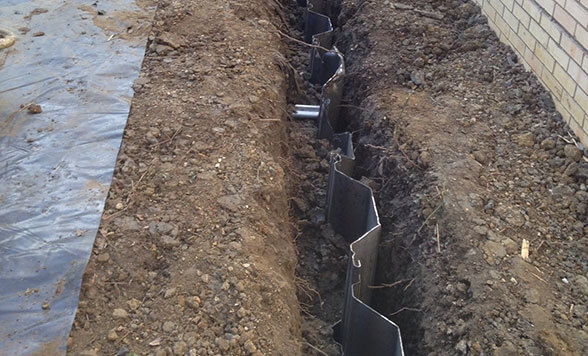
Step 2 — Trenching
Once the underground map is clear, you open up a narrow root barrier trench along the line where the barrier needs to intercept the root path between tree and structure.
Typical trench specs in Tampa:
- Width: 6–12 inches, depending on whether you’re using HDPE panels, geotextile, or building an air-gap trench.
- Depth: 24–36 inches in sandy soil, set by the design depth for the target you’re protecting.
- Alignment: A continuous line between the tree and the target (foundation, driveway, patio, sewer line) with as few breaks or tight jogs as possible.
Key Tampa-specific considerations:
- Dry, collapsing sand: In loose sand, trench walls tend to slough off. Competent crews deal with that by working in shorter sections, shoring trenches, or using trench shields to keep workers and barriers safe.
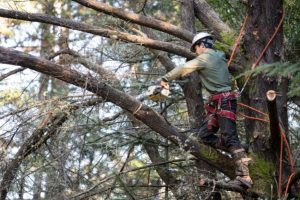
- Existing roots: Big roots crossing the trench have to be cut carefully. Overdoing it can destabilize the tree or shock it. Around larger Live Oaks and other big specimens, bring in a Tampa arborist assessment before cutting any major roots.
- Water intrusion: In spots with a higher water table, trenches can start collecting water quickly. Crews may need small pumps or to dig in phases so they can set the barrier before the walls soften.
Step 3 — Barrier Placement
After the trench is open and cleaned up, it’s time to install the barrier itself. In Tampa, that typically means an HDPE root barrier membrane such as DeepRoot barrier. This is where the details determine how well the system holds up over decades.
Best practices for barrier placement:
- Install the barrier with the smooth side facing the tree. This helps shape the root deflection angle and makes it harder for roots to get a grip on the surface and press through.
- Let the barrier top run slightly above grade (about 1–2 inches) so that surface roots can’t simply grow right over it.
- Use the manufacturer’s recommended hardware or overlap method for joints:
- Where panels allow, overlap by 12–18 inches so you don’t create a straight seam for roots to follow.
- Fasten or seal overlaps with approved clips, tapes, or connectors to keep roots from slipping into those weak points.
- For foundation protection zones, position the barrier between the tree and the structure in as straight a line as the site allows. Sharp inside corners or zigzags often turn into future problem spots.
For sewer lateral protection in Hillsborough County:
- Run the barrier parallel to the sewer line, always on the tree side, so roots hit the barrier before they see the pipe.
- Keep the barrier 18–36 inches from the pipe, balancing root control with enough distance to avoid undermining or damaging the line during installation.
- Where you can, extend the barrier at least 12 inches below the pipe invert so roots can’t dive under and attack the joints from below.
- Pay extra attention to joint protection along the stretch closest to pipe joints, because those are always the first failure points when roots find a way around.
Step 4 — Backfill & Restoration
Backfilling a barrier trench in sandy soil looks simple, but it’s one of the steps that makes or breaks the system. Poor compaction lets panels twist, sink, or separate, and in a few years you’re right back to chasing root problems.
Backfill protocol:
- Place backfill in 6–8 inch lifts and tamp lightly after each lift to build stable backfill compaction without crushing or bowing the barrier.
- Use the native sand where possible, and only add organic matter on the tree side of the trench. Against the barrier itself, you don’t want a “super soil” zone that encourages roots to push harder.
- Keep big rocks, concrete chunks, and debris off the barrier face. Those can create point loads that puncture the membrane over time.
Surface restoration:
- Reinstall sod, mulch, or decorative stone so the area looks like it did before the dig, or better.
- Reset irrigation heads so they’re not soaking the barrier top constantly. A permanent wet line along the barrier edge invites roots to try to bridge over.
- Where the trench runs under or next to pavement, compact the subgrade thoroughly before patching concrete, asphalt, or pavers to avoid future settling or cracking.
Professional outfits like Panorama Tree Care root barrier service build all of this into a system. You get utility coordination, proper trenching, barrier installation, and backfill, all with arborist input so you’re protecting both the structure and the long-term health of your trees.
Root Barriers in South Tampa’s Older Neighborhoods
South Tampa is its own animal. You’ve got huge Live Oaks, magnolias, and laurel oaks planted when cars were smaller and houses were lighter. Those trees have had 60 to 100+ years to send roots under driveways, porches, and clay sewer laterals. Add tight property lines and a tangle of old and new utilities and you’ve got a tough environment for root barrier work.
Key attributes in South Tampa root barrier challenges:
- Average lot age: Many homes are 60–100+ years old, often with multiple rounds of additions and repairs.
- Mature tree prevalence: Very high. Massive Live Oaks dominate streetscapes and can share root zones with multiple structures.
- Foundation type: Older stem walls, pier-and-beam systems, and shallow footings that move more easily and don’t tolerate much extra root pressure.
- Utility density: Congested, with old cast iron or clay laterals sharing space with newer PVC, communications lines, and irrigation all packed into narrow runs.
- Access limitations: Tight side yards, low clearances, and limited room for machinery, which often forces more hand-digging.
Assessment before installation:
- Use an air spade assessment around key trees to expose the root flare and main structural roots gently so you know exactly what you’re cutting and what you’re working around.
- Get a Tampa arborist assessment to map out the tree’s critical root zone and decide which roots can be cut with acceptable risk and where the barrier should be located to protect structures without destabilizing the tree.
- If the house already has noticeable cracking, sloping floors, or doors that won’t close, bring in a foundation specialist. Root barriers are prevention and mitigation tools. They don’t magically fix existing damage, which is covered elsewhere in detail.
Neighborhood-specific recommendations:
- Narrow lots: Use slimmer trench profiles and more hand-digging near corners, porches, and steps where machinery can’t safely operate without risking the structure.
- Historic foundations: Aim for foundation protection barriers roughly 12–24 inches from the foundation on the tree side, with 30–36 inch depth to cover the main root zone that affects those shallow systems.
- Shared trees: For trees close to property lines, coordinate with neighbors and potentially the city. Your barrier layout may need to consider multiple homes, driveways, or shared sewer laterals.
- Mature Live Oaks: Consider phasing the work. Instead of cutting a big percentage of major roots in one go, install part of the barrier, allow the tree to adjust, then complete the line later, with follow-up monitoring.
Tree removal in South Tampa can get political fast. Many homeowners and neighborhoods fight to keep canopy coverage. Root barriers are often the preferred tree removal alternative here, giving you a way to protect fragile, older structures while preserving the character and shade those big trees provide.
Root Barrier Cost in Tampa 2026
For 2026, most professional root barrier projects in Tampa are falling in the $15–$40 per linear foot range. HDPE setups usually hit that $15–$30 band. Copper fabrics and complex air-gap drainage systems can run higher. On typical residential jobs of 50–150 feet, most homeowners are landing somewhere between $750–$6,000.
To put that in perspective, decent foundation repairs often start around $5,000 and can push to $30,000 or more. Sewer lateral replacements regularly sit in the $3,000–$15,000 range, especially if you have to cut driveways or work in tight South Tampa corridors. In that light, a properly designed barrier is cheap insurance.
Cost drivers:
- Barrier type:
- HDPE panels: usually $15–$30/ft installed, depending on depth and site access.
- Copper-impregnated geotextile: often on the higher side due to product cost and the care needed to install it correctly in sand.
- Air-gap systems: widely variable. Simple gravel trenches are cheaper, complex French-drain style systems with sump tie-ins cost more.
- Depth: Going to 30–36 inches means more digging, more soil to haul, more time, and sometimes shoring, which all add to the bill.
- Access: Tight South Tampa side yards, backyard-only access, or areas near decks and pools usually require smaller equipment or hand-digging, which drives labor costs up.
- Obstacles: Thick roots, utilities, tree wells, hardscape removal and replacement, and working around existing structures all raise complexity and cost.
Typical project scenarios:
- Driveway edge protection (50–80 ft): About $1,000–$2,500, depending on thickness, depth, and whether concrete or pavers need cutting and re-setting.
- One side of a house foundation (80–120 ft): Roughly $1,500–$4,000, with costs skewing higher on older South Tampa houses with tight access.
- Sewer lateral protection plus foundation line (100–150 ft): About $2,500–$6,000, especially if you’re tying into access pits for camera inspection or working in congested utility zones.
Once you factor in the cost and disruption of tearing up a driveway or digging out a failed sewer line under a mature tree, a well-planned barrier becomes one of the more economical long-term strategies you can choose.
Hidden costs to keep in mind:
- Post-install camera inspection of sewer laterals if the work ran near or over the pipe, just to verify nothing was damaged and roots aren’t already inside.
- Fixing irrigation, low-voltage lighting, or drainage lines that had to be cut or rerouted during trenching.
- Periodic root barrier maintenance inspection every 3–5 years on high-value properties, especially in South Tampa where soil movement and heavy canopy can hide early warning signs.
Root Barrier Design Specs & EAV Details
HDPE Root Barrier Membrane Specs
The table below gives a quick look at the typical HDPE root barrier specs used around Tampa. These numbers help benchmark what a decent system should look like in sandy soil.
| Attribute | Typical Value in Tampa |
|---|---|
| Thickness (mils) | 40–80 mils |
| Depth (Tampa installation) | 24–36 inches |
| Cost per linear foot (USD) | $15–$30 (installed) |
| Lifespan (years) | 30–75 years |
| Root penetration resistance (%) | 95–99% with sealed joints |
Tampa Sandy Soil Root Dynamics
Sandy soil changes how roots behave. This table sums up how Tampa’s sands compare to heavier soils and why that matters for barrier depth and placement.
| Attribute | Typical Behavior |
|---|---|
| Lateral spread rate vs clay | Up to 2–3× faster lateral spread |
| Typical root depth | 6–24 inches for most feeder roots |
| Water table influence | Shallow water tables keep roots active in a limited vertical band, encouraging broad spread |
| CEC rating | Low—nutrients leach quickly |
| Barrier depth requirement | At least 6 inches deeper than clay standards (i.e., 24+ inches) |
Foundation Protection Barrier Specs
Here’s what a typical foundation protection layout should look like in Tampa’s sandy soils if you want long-term peace of mind.
| Attribute | Typical Recommendation |
|---|---|
| Distance from foundation | 12–24 inches (tree side) |
| Depth | 30–36 inches in sandy soil |
| Barrier type | HDPE membrane recommended |
| Installation side | Between tree and foundation |
| Monitoring frequency | Every 3–5 years |
Sewer Lateral Root Protection Specs
Sewer lines are some of the most common and expensive root-damage hotspots. These specs outline how to set up a barrier so it actually protects the pipe.
| Attribute | Typical Recommendation |
|---|---|
| Barrier placement | Parallel to sewer line, tree side |
| Distance from pipe | 18–36 inches (site-specific) |
| Depth below pipe | At least 12 inches below pipe invert where feasible |
| Joint protection | Highest priority; align barrier to intercept roots before pipe joints |
| Inspection post-install | Camera inspection recommended |
South Tampa Root Barrier Challenges (Summary)
South Tampa lots combine old infrastructure, tight spaces, and big trees. This summary table captures the conditions that make root barrier work here more specialized than in newer subdivisions.
| Attribute | Typical Condition |
|---|---|
| Average lot age | 60–100+ years |
| Mature tree prevalence | High |
| Foundation type | Older stem walls, pier-and-beam, shallow slabs |
| Utility density | High, mixed-age infrastructure |
| Access limitations | Narrow lots, limited equipment access |
Common Root Barrier Mistakes in Tampa (and How to Avoid Them)
Mistake 1: Installing Barriers Too Shallow
One mistake I see constantly is using a generic 18-inch depth that might work in clay but barely slows roots down in Tampa sand. People feel good right after the install, then a few years later they’re shocked to see roots undercutting the barrier and pushing on their slab again.
Fix: Design for your soil. In Tampa, specify 24–36 inch depth and match the depth to tree size, target structure, and local water table. If you’re protecting a slab or a sewer lateral, err deeper, not shallower.
Mistake 2: Gaps and Poorly Sealed Joints
HDPE panels are only as strong as their seams. Tiny gaps where panels overlap or where connectors were skipped become superhighways for roots. In a few years those tiny mistakes turn into cracks or lifted concrete right where the joint was.
Fix: Use the manufacturer’s connectors or recommended overlaps, give yourself enough overlap length, and physically inspect every barrier overlap joint before you start backfilling. If a joint looks weak now, roots will find it later.
Mistake 3: Placing the Barrier on the Wrong Side
It sounds obvious, but I’ve seen barriers installed behind houses or behind driveways, nowhere near the actual root path. In that setup, roots still have a clear run between the tree and the structure, and the barrier is just plastic in the ground not doing anything.
Fix: Always design the barrier to sit between the tree and whatever you’re trying to protect, cutting across the path roots would naturally take to the foundation, slab, or pipe.
Mistake 4: Ignoring Existing Damage
Another trap is throwing a barrier into the ground after roots have already cracked a foundation or invaded a sewer, then assuming the problem is solved. The damage doesn’t magically undo itself. You’ve just slowed down future intrusion while the current issue keeps getting worse.
Fix: Combine barrier work with proper root damage repair. That can mean foundation underpinning, slab lifting, or sewer line repair plus a camera inspection. The barrier then prevents the same problem from coming back.
Mistake 5: DIY Trenching Near Major Trees
I’ve watched well-meaning homeowners trench right through major roots of big Live Oaks and other mature trees, then wonder why the tree declined a year or two later or started dropping heavy limbs. Cutting the wrong roots can destabilize a tree or stress it badly.
Fix: For any large or high-value tree, bring in a certified arborist and consider contractors like Panorama Tree Care root barrier service. They know how much root you can safely cut, where the critical root zone lies, and how to route the trench without setting the tree up for failure.
Mistake 6: Zero Follow-Up
Root barrier systems are long-term tools, but they’re not “install and forget forever”. Soil settles, landscaping changes, and new trees or shrubs get planted on the wrong side of the barrier. After enough years, all that can chip away at the original protection.
Fix: Plan on root barrier maintenance inspections every 3–5 years, especially on older South Tampa properties and around critical structures. Look for exposed tops, soil washouts, or new root paths over or around the barrier and adjust before you’re staring at structural damage again.
FAQ: Root Barriers for Florida’s Sandy Soil (Tampa Focus)
How long do tree root barriers last in Tampa?
Quality HDPE root barriers that are installed correctly in Tampa’s sandy soil generally last in the 30–75 year range. The exact number depends on panel thickness, how much of the top edge is exposed to sunlight, and how stable the surrounding soil stays. Copper-impregnated geotextiles typically hold up around 20–40 years. Air-gap trenches don’t really “wear out” the same way, but their effectiveness depends on how well you maintain the gravel and drainage so they don’t fill in with sand and silt.
Are root barriers really effective in Florida’s sandy soil?
Yes. If they’re installed to the right depth, joints are sealed, and the layout actually intercepts the root path, barriers work very well in sand. In Tampa’s conditions, properly designed systems routinely block or redirect 95–99% of intrusive roots. They’re especially effective as part of a plan for foundation protection and sewer lateral protection, backed up with periodic inspection and solid tree care.
Can you install root barriers around existing trees?
You can, and that’s how most projects actually happen, since the tree is usually there first. The catch is you have to respect the tree’s structure. You almost never want to fully encircle a mature tree with a tight ring of barrier, because that can choke the root system and destabilize it. Instead, barriers are laid in arcs or straight lines between the tree and the structure you’re protecting.
A Tampa arborist assessment is a smart move for mature trees. The arborist can map structural roots, set safe cutting limits, and help determine the best barrier alignment to protect the building while keeping the tree healthy.
Is DIY root barrier installation a good idea?
For a small ornamental tree, a short section of shallow barrier away from utilities, and someone who’s handy with a shovel, DIY can be fine. But once you’re working near foundations, driveways, or sewer lines, or you’re going deeper than a couple feet in sandy soil, the margin for error shrinks fast. Utility hits, poor depth, bad joints, or cutting the wrong roots can cost you far more than hiring a pro.
How often should root barriers be inspected?
Plan on a quick visual check every 3–5 years. Walk the line, look for exposed barrier tops, washouts, or new roots trying to grow over the top. In areas where the barrier protects a sewer lateral, adding a periodic camera inspection lets you confirm that roots aren’t finding their way in at pipe joints or unprotected segments down the line.
Do root barriers stop trees from growing?
No. Root barriers don’t shut down tree growth. They redirect it. When laid out properly, they encourage roots to go deeper and out away from structures where they can still pick up water and nutrients without tearing up your slab or pipes. Problems show up when barriers are placed too close to the trunk or when installers take out too many major roots at once. That’s where arborist input pays off.
Can root barriers help with invasive root species?
Yes, they’re often part of the toolkit for trees known for aggressive or invasive root systems. A barrier can keep those roots from wrecking hardscape or clogging lines while you keep the canopy. For species-by-species guidance on invasive root species and where barriers make sense versus removal or replacement plantings, check our dedicated page on the topic.
Are root barriers a good alternative to tree removal?
In many Tampa yards, yes. If the issue is roots heading toward your slab or sewer but the tree itself is healthy and structurally sound, a well-designed barrier is often the better move than cutting the tree down. It lets you keep shade, property value, and neighborhood character while reducing risk.
That said, if a tree is already structurally compromised, badly decayed, or causing damage that can’t realistically be managed, even the best barrier won’t fix that. In those cases, removal might still be the right call. Our guide on tree removal alternative decisions walks through how to weigh those options.
Protecting Tampa Properties with Smart Root Barrier Design
Tampa’s sandy soil gives tree roots an easy ride straight into foundations, driveways, and sewer laterals. Without some form of control, those roots will eventually find where your structures are weakest. Properly designed and installed root barriers, especially HDPE membranes like DeepRoot barrier, put a tough, long-lasting line of defense in the ground that nudges roots deeper and away from anything expensive.
Once you stack the tree root barrier cost against what you’re likely to spend on foundation or sewer repairs down the road, proactive barriers usually come out ahead, and you get to keep the trees that make your property worth living on. For situations where damage has already started, take a look at our root damage repair guide, and for species that are known troublemakers see our page on invasive root species.
If you’re in Tampa, especially in South Tampa’s older neighborhoods, and you want a barrier plan that respects both your house and your trees, schedule a Tampa arborist assessment and ask about Panorama Tree Care root barrier service. Getting the design and installation right now can keep your home, hardscape, and sewer lines safe for decades to come.
Contact our Tampa tree service team for a free assessment and estimate.